分類: VMWare
VMWare 大量部署時 批次(靜默)安裝 vmtools 指令
windows xp vm tool slientmod
setup.exe /s /v "/qn REBOOT=R"
Here is an explanation of the switches.
/S = Silent
/v pass paramaters to msi directly
/qn do silent install
REBOOT=R = Really Do not reboot
ADDLOCAL=ALL = Install all components locally
REMOVE = The components listed will not be installed
VM-Server Client OS 關機,開機範例
以下在 windos版 VM-Server 2.x 測試過,可以利用批次做關機,開機利用排程完成完整的VMX備份
,解決免費版的備份問題(真的有解決嗎 ? 好像只是一個最憋腳的解決方法)
“<>” 請自行帶入自己的資訊
關機:
|
1 |
<span style="color: #606060" id="lnum1"> 1:</span> C:\Program Files\VMware\VMware Server\vmrun -T server -h / |
|
1 |
<span style="color: #606060" id="lnum2"> 2:</span> https://<IP>:8333/sdk -u <user> -p <password> stop <span style="color: #006080">"[standard] winxp/winxp.vmx"</span> |
開機:
|
1 |
<span style="color: #606060" id="lnum1"> 1:</span> C:\Program Files\VMware\VMware Server\vmrun -T server -h / |
|
1 |
<span style="color: #606060" id="lnum2"> 2:</span> https://<IP>:8333/sdk -u <user> -p <password> start <span style="color: #006080">"[standard] winxp/winxp.vmx"</span> |
如何在VMware上安裝SUSE LINUX Enterprise Server 9
如何在VMware上安裝SUSE LINUX Enterprise Server 9
1. 啟動VMware:File->New Virtual Machine->Guest OS:SUSE Linux Enterprise Server-
>Use Bridged Networking
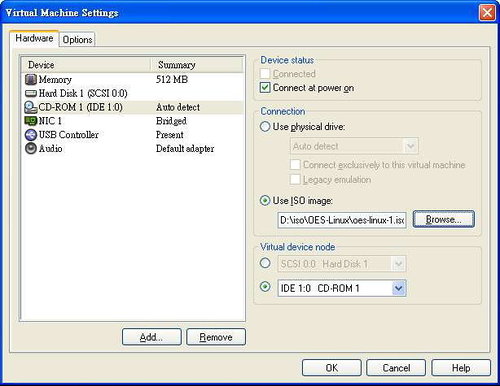
2. 改變Virtual Machine Settings:VM->Settings->
- 將Memory改為512MB;將CD-ROM改為Use ISO image: 指到安裝iso檔存放的位置

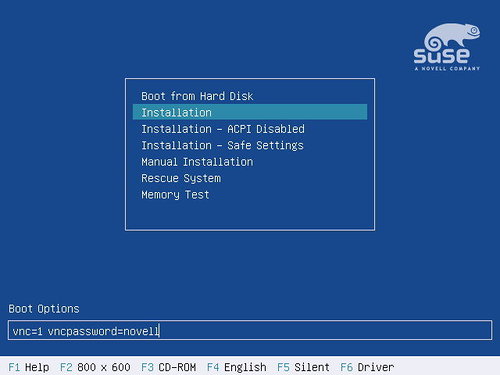
3. 啟動Virtual Machine,並在第一個畫面中設定Boot Options,如圖
Boot Options: vnc=1 vncpassword=novell

4. 設定Virtual Machine的IP:192.168.50.99
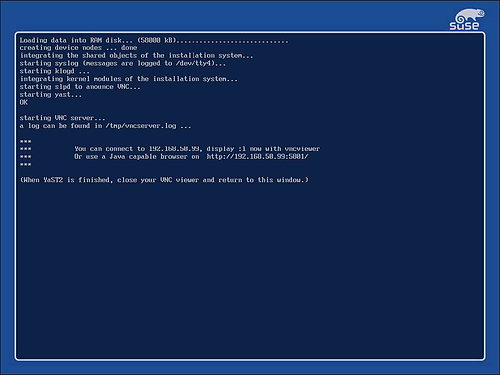
5. 接著會在Vitural Machine看到以下

6. 在另一部電腦上開啟Browser,http://192.168.50.99:5801/,即可進行安裝
7. 或者用VNC Viewer連接192.168.50.99:5901,即可進行安裝
8. 接下來就按一般情況安裝